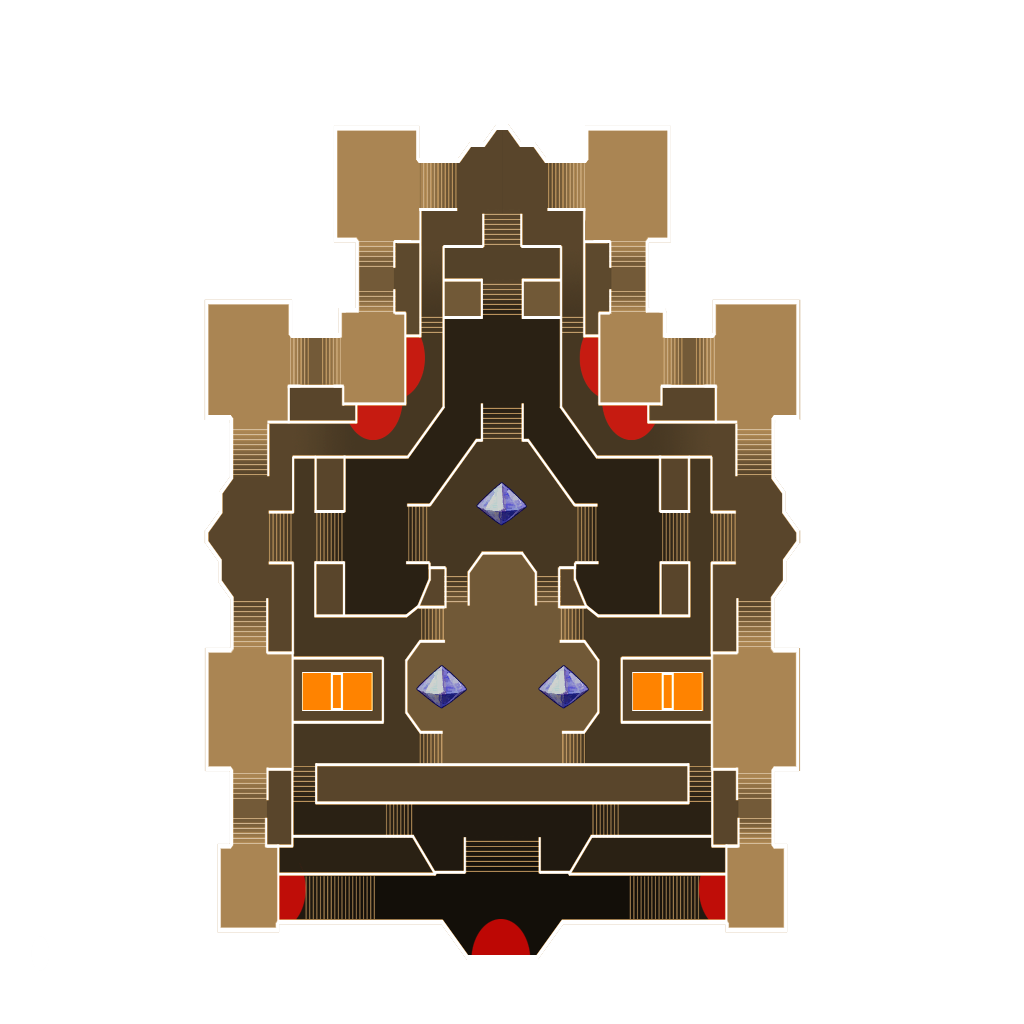


Quickly test tower tweaks directly in this build view. Changes are not saved.
Click on a numbered hint marker on the map to zoom and highlight nearby towers. Double click on map to reset zoom.
No hint selected.
Highlight placed towers (Chrome limitation applies)


| Name | HP | Damage | Range | Rate |
|---|---|---|---|---|
 Monk Monk | 4000 | - | 8100 | - |
 Series-EV Series-EV | 3100 | 9600 | 4500 | 4400 |
 Warden Warden | 3400 | 8000 | 4500 | 4500 |
Build Status: Public
Difficulty: Ruthless
Game Mode: Survival
Hardcore: No
Ruthless: Yes
Mix Mode: No
AFK Able: No
Mana Used: 0
Mana to Upgrade: 0
More Builds from Sleepy
Everything needs to be max upgraded. I equip my upper Jester with a chicken baller for this map. I don't know what stats are needed, but if you don't have enough damage and tower health, this build will not work. With my stats, the auras should at most reach 1/4 of their health on the last wave. Waves 32 to 34 should have combat around 3:12 each. Wave 35 should have combat around 4:20. Just information for your AFK timing needs if using this for farming dragons like I do.
I tested this very thoroughly for stability. I did figure out a build that doesn't require upgrading towers, but that build and combat times were just too long for the build to be useful. It's easier and faster to just use an upper to upgrade the towers for the first wave than to try avoid upgrading towers.
Hint 1
- Summoner with App/Huntress.
- Build the tower stack on the small pillar.
Hint 3
- Summoner with App/Huntress. This Summoner should be boosting the Shroom Pit and Forest Golem as well.
- Place the SAMs so that one line of the angle marker is parallel to a line running directly west to east. In other words, the SAMs will be pointed more towards the north or the south than they are to the east or the west.
Hint 4
- Summoner with App/Huntress.
- The Shroom Pit is on the ground between the Cloud Towers and Forest Golem.
- The Forest Golem is on top of the boxes.
Hint 5
- Place a troll DPS summoner on the ground here to speed things up more. Make sure one of the equipped pets can heal (such as a Desert Goblin). It isn't necessary, but it helps speed things up by about 15 seconds or so.
An overview look at the build:
